In diesem Tutorial zeige ich, wie man in dem Theme Divi Module ineinander verschachtelt. In dem Beispiel werden wir drei Preistabellen erstellen, die dann per Button/Switch über das Modul Registerkarte umgeschaltet werden können.
Anleitung: Divi Module verschachteln
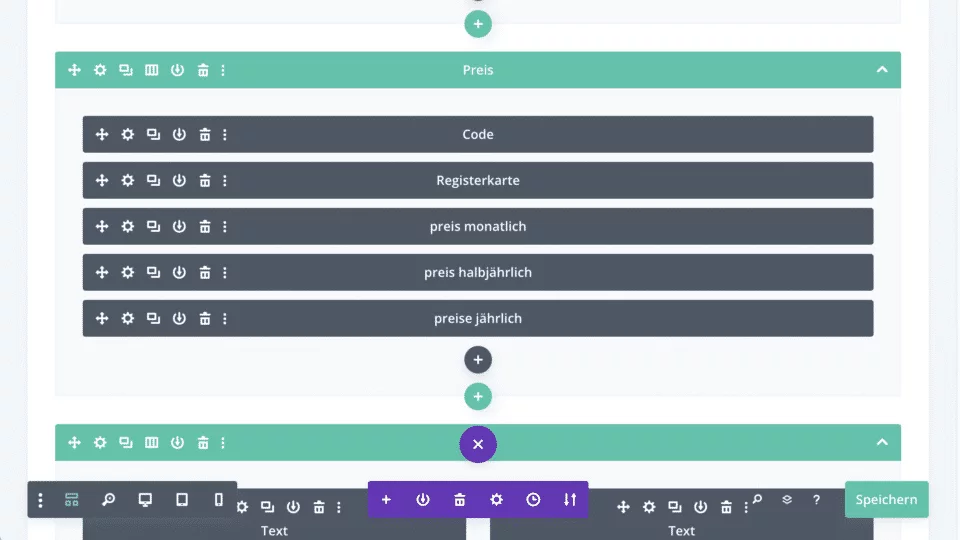
Erstelle eine Zeile und für füge die Module hinzu, die du verschachteln möchtest. In meinem Beispiel habe ich 3 Preistabellen eingefügt, jeweils für die Preistabelle „Monatlich“, Halbjährlich“, Jährlich“.
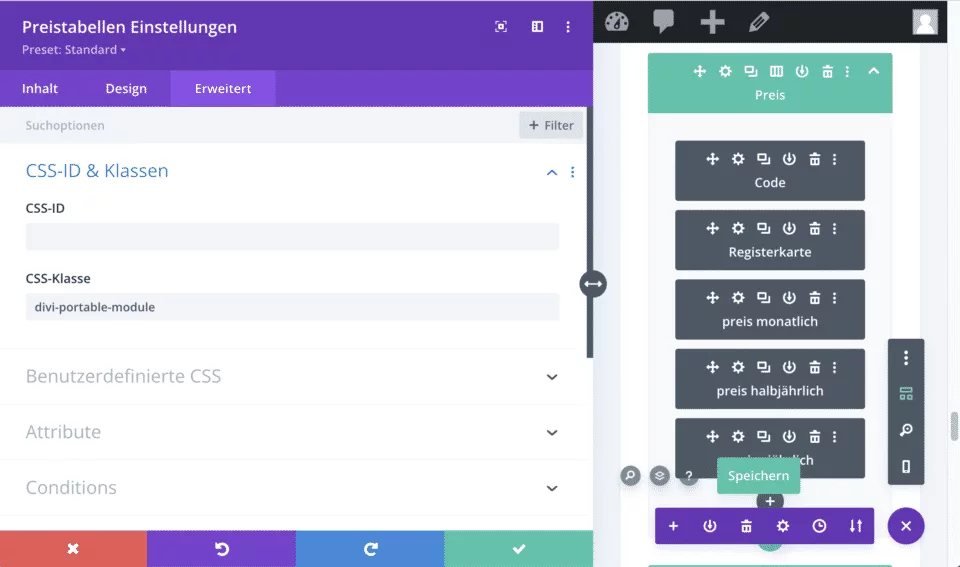
Für jede Preistabelle lege nun eine eindeutige CSS-Klasse fest. Trage dazu in den erweiterten Einstellungen der jeweiligen Preistabellen eine CSS-Klasse ein.
Preistabelle 1: divi-portable-module
Preistabelle 2: divi-portable-module2
Preistabelle 3: divi-portable-module3
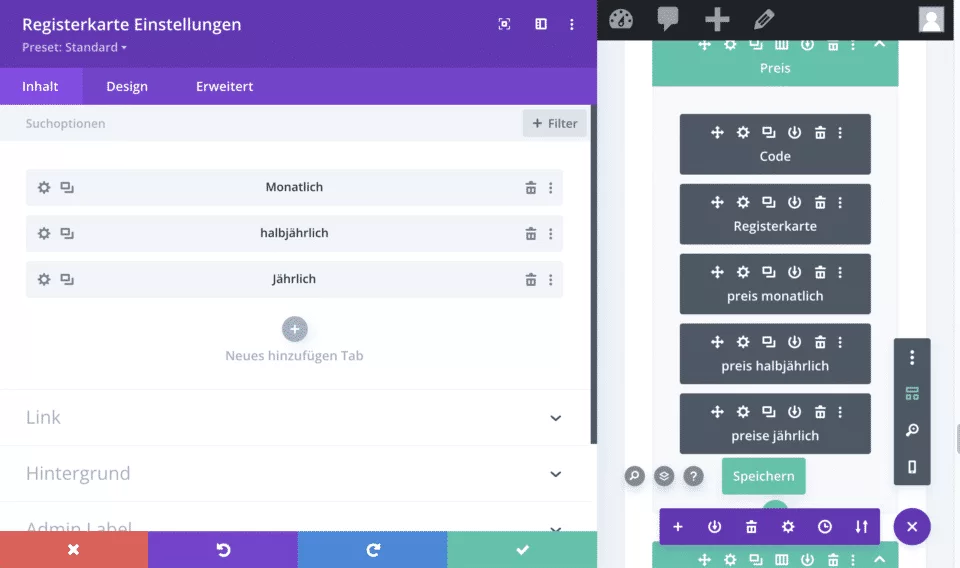
Nun müssen wir festlegen, in welches Modul wir unsere Preistabellen verschieben wollen. Ich verschiebe diese in das Modul REGISTER. Dabei lege ich pro Preistabelle einen eigenen Register-Tab an.
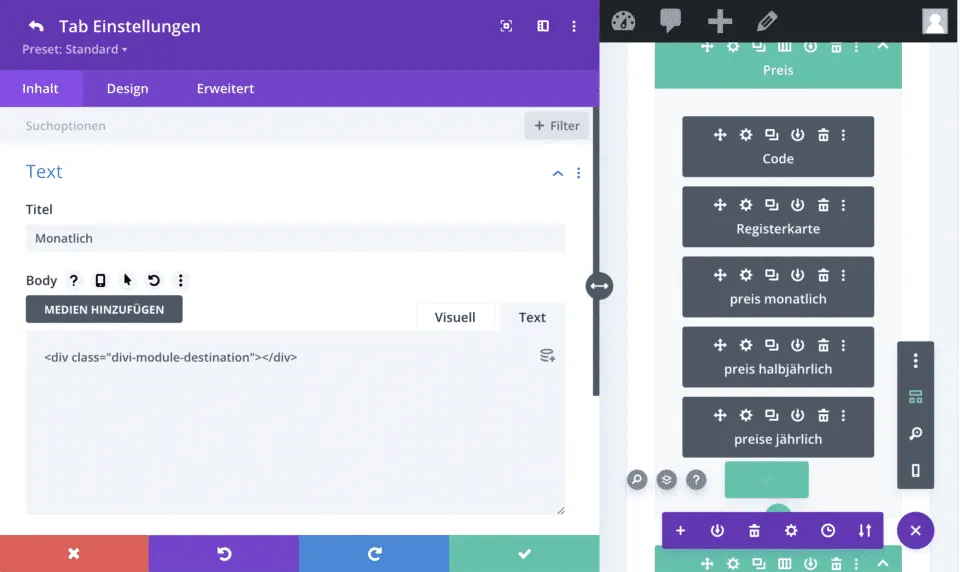
Für jeden Tab füge dann den zu den Preistabellen passenden Code ein. Beachte, dass dieser in die TEXT-Ansicht kopiert werden muss!
Tab 1 für Preistabelle 1: <div class=“divi-module-destination“></div>
Tab 2 für Preistabelle 2: <div class=“divi-module2-destination“></div>
Tab 3 für Preistabelle 3: <div class=“divi-module3-destination“></div>
Prima. Jetzt müssen wir per JS die Module verschachteln. Füge dazu das Modul CODE ein und dort den Code von unten. Vor dem Code musst du noch <script> und nach dem Code </script> einfügen, damit der Code ausgeführt werden kann.
(function ($) {

$(document).ready(function () {

// Option #1: Move Divi Module(s) into a Module

// Limit: One Instance per Column

// Use following code if you want to move

// a module inside another module. Each column with the

// class 'parent-column' will append any module(s)

// with the class 'divi-portable-module' to the div

// with the class 'divi-module-destination'.

// Only one instance of 'divi-module-destination' should

// be added per column.

$('.divi-portable-module').each(function () {

$(this).closest('.parent-column').find('.divi-module-destination').append($(this));

});

$('.divi-portable-module2').each(function () {

$(this).closest('.parent-column').find('.divi-module2-destination').append($(this));

});

$('.divi-portable-module3').each(function () {

$(this).closest('.parent-column').find('.divi-module3-destination').append($(this));

});

// Buttons: Insert Button Module(s) into a Module

// Adding a custom CSS class to a button module

// is applied to the 'a' tag which is a child element

// of the module wrapper. This code makes sure to append

// the entire button module wrapper (the parent element)

// as well. This functionality is the same as option #3 above.

// Siimply use the class 'divi-portable-button' on a button module

// instead of 'divi-portable-module'.

$('.divi-portable-button').parent().each(function () {

$(this).closest('.parent-column').find('.divi-module-destination').append($(this));

});

// Option #2: Move Divi Row(s) into a Module

// Limit: One Instance per Section

// Use the following code if you want to move

// a row inside a module on more than one section

// of a page. Each section with the

// class 'parent-section' will append any row(s)

// with the class 'divi-portable-row' to the div

// with the class 'divi-row-destination'.

// Only one instance of 'divi-row-destination' should

// be added per section.

$('.divi-portable-row').each(function () {

$(this).closest('.parent-section').find('.divi-row-destination').append($(this));

});

});

})(jQuery);
Beachte, dass du für unsere 3 Tabs die 3 passenden Anpassungen vornehmen musst.
$('.divi-portable-module').each(function () {

$(this).closest('.parent-column').find('.divi-module-destination').append($(this));

});

$('.divi-portable-module2').each(function () {

$(this).closest('.parent-column').find('.divi-module2-destination').append($(this));

});

$('.divi-portable-module3').each(function () {

$(this).closest('.parent-column').find('.divi-module3-destination').append($(this));

});
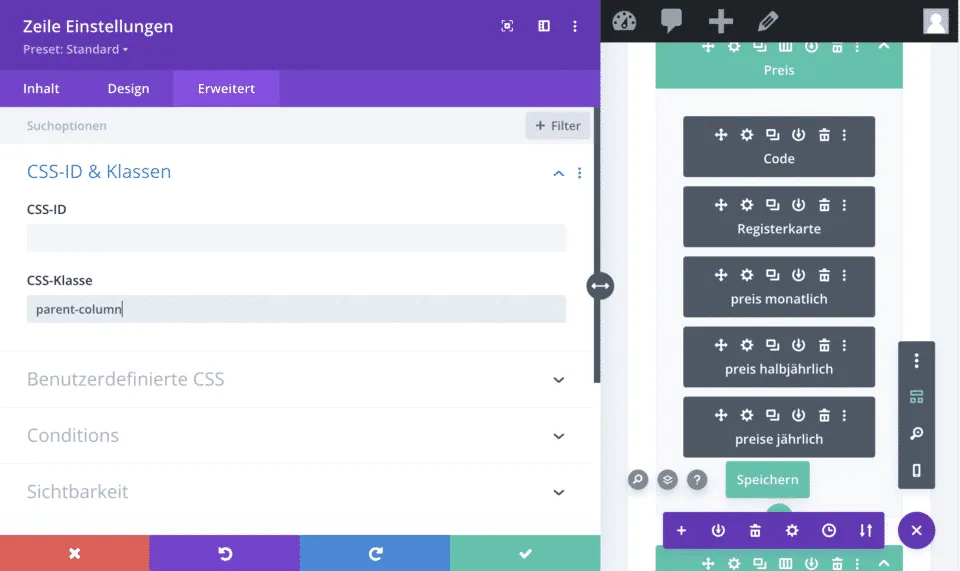
Okay. Zu guter Letzt müssen wir noch festlegen, in welcher Zeile der Zauber stattfinden soll. Dazu legen wir in der Zeileneinstellung und erweitert die CSS-Klasse fest:
parent-column
Fertig. Wer jetzt noch möchte, kann per CSS die Tabs als Buttons gestalten. In meinem Beispiel habe ich diese wie folgt formatiert.
/* price register */

ul.et_pb_tabs_controls {

background-color: #fafbfd;

boder: 0px !important;

}

ul.et_pb_tabs_controls:after {

border-top: 0px solid #d9d9d9;

}

.et_pb_tabs_0.et_pb_tabs .et_pb_tabs_controls li, .et_pb_tabs_0.et_pb_tabs .et_pb_tabs_controls li a {

border-radius: 50px;

margin-right: 10px;

}

.et_pb_tabs_0.et_pb_tabs .et_pb_tabs_controls li a {

border: 1px solid #00aeff!important;

}
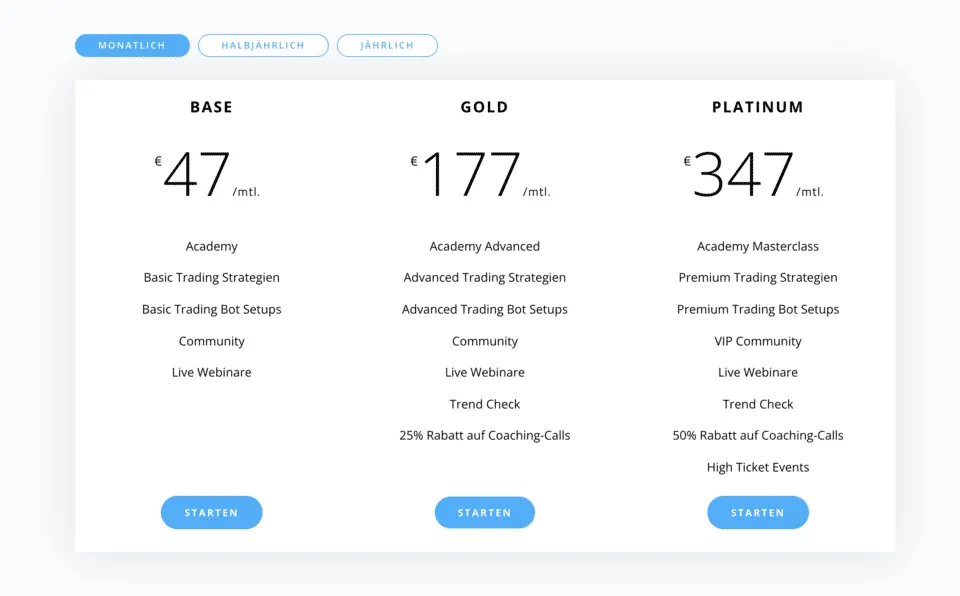
Das Ergebnis sieht dann wie folgt aus …



0 Kommentare